8/14/2020
The ABCs of Removing ABCs in Tableau Text Tables
When creating text tables in Tableau without measures, one of the most common questions that comes up is how to remove the ABCs that show up in the text table. By default, Tableau will use the "Abc" placeholders to express any values that could be potentially displayed. For example, if you only use dimensions and/or discrete values in a text table, the empty column will automatically fill "Abc" as a placeholder. You may find yourself needing only dimension and discrete values without measures and therefore wanting to remove these "Abc" placeholders. In this blog post, I have tried to write up a comprehensive list of solutions. I will outline the traditional ways I've seen people use to remove the placeholders and offer what I feel are the three best solutions.
NOTE - If you are just looking for the best solutions, then feel free to jump to #1-3 below (and be sure to check out #3). I prefer these methods because they solve the issue without creating other issues. Also, I've included a summary at the end of this post for comparison.
For these examples I am going to use the classic Sample Superstore dataset. Specifically, I use two dimensions, Last Name and First Name that are split fields from Customer Name. These field are created by right-clicking on Customer Name and selecting Split. Then I rename them to Last Name and First Name. Feel free to use any dimensions, for example, Category and Subcategory will work the same.
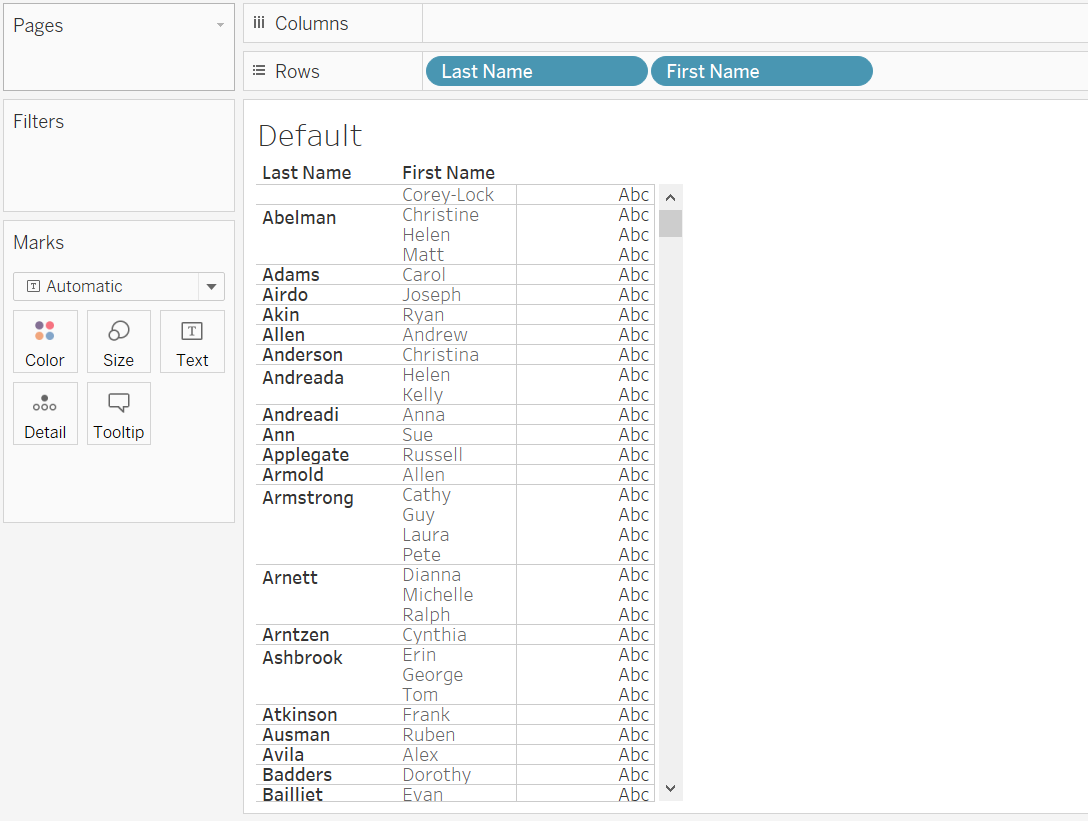
Here is the default view when placing Dimensions or Discrete values on the Rows without any Measures. Notice the Abc placeholders.
Change the Mark to Polygon
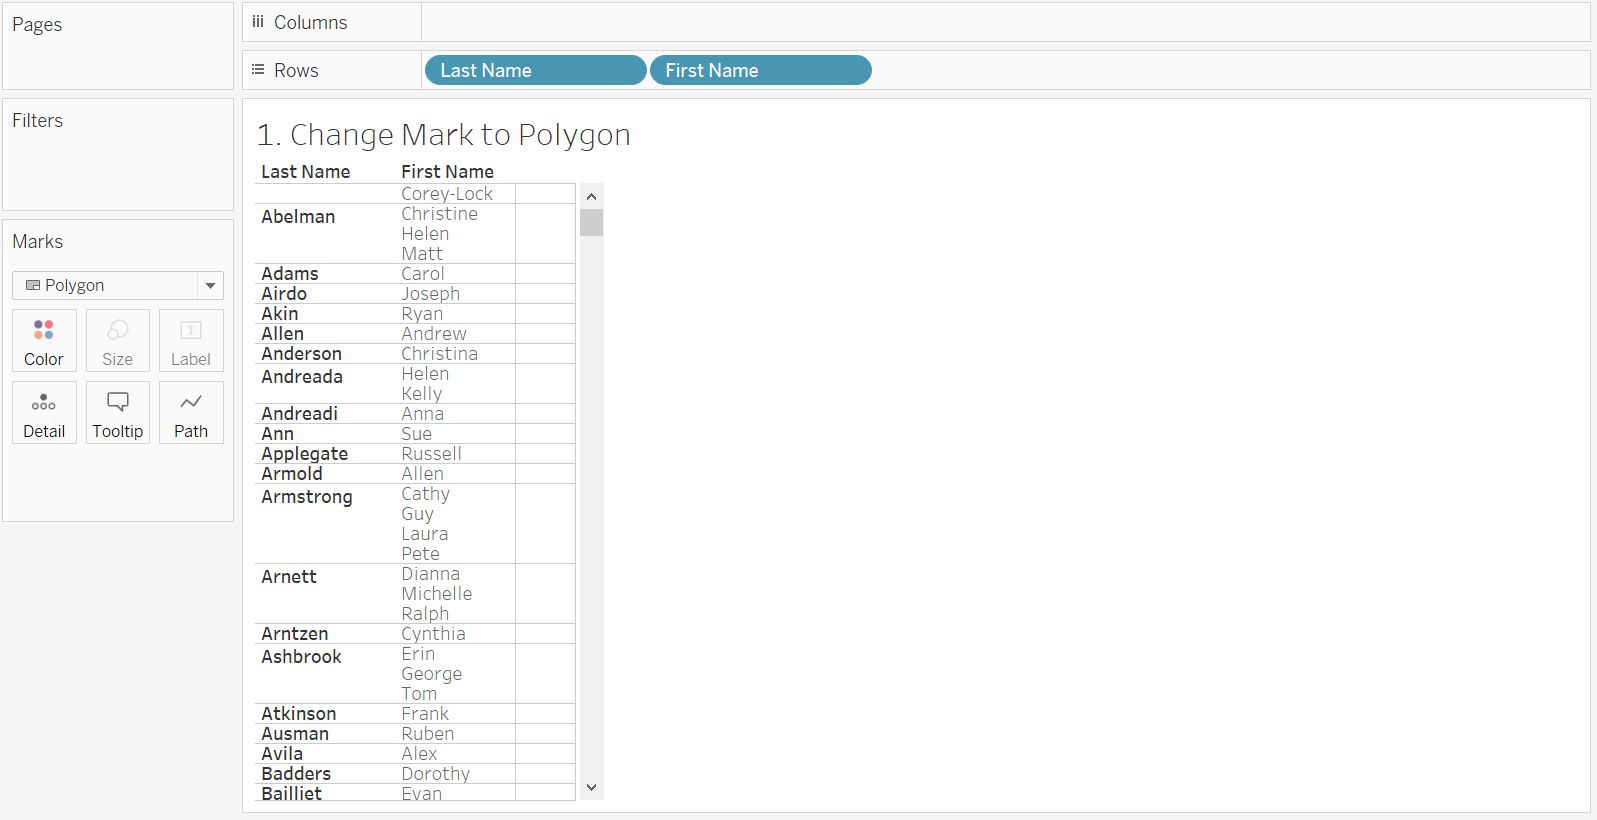
On the Marks Card, select the dropdown box and change the marks type to Polygon. Polygons (and lines) use the Path in order to connect multiple points into a polygon. Since Polygons do not allow Text labels, the Abc placeholder is gone.
CONS - there are two issues with using Polygons. First, the column is still there and there are marks on that column. While a user can't select a single mark or hover over them for tooltips, it is possilbe to select multiple marks using the selection tools. This can be solved by adding a Blank Text on Path. The bigger issue is that the Polygon marks can cause issues with the animated transitions (Tableau's "animation") when you publish workbooks.
Use Blank Text on Text
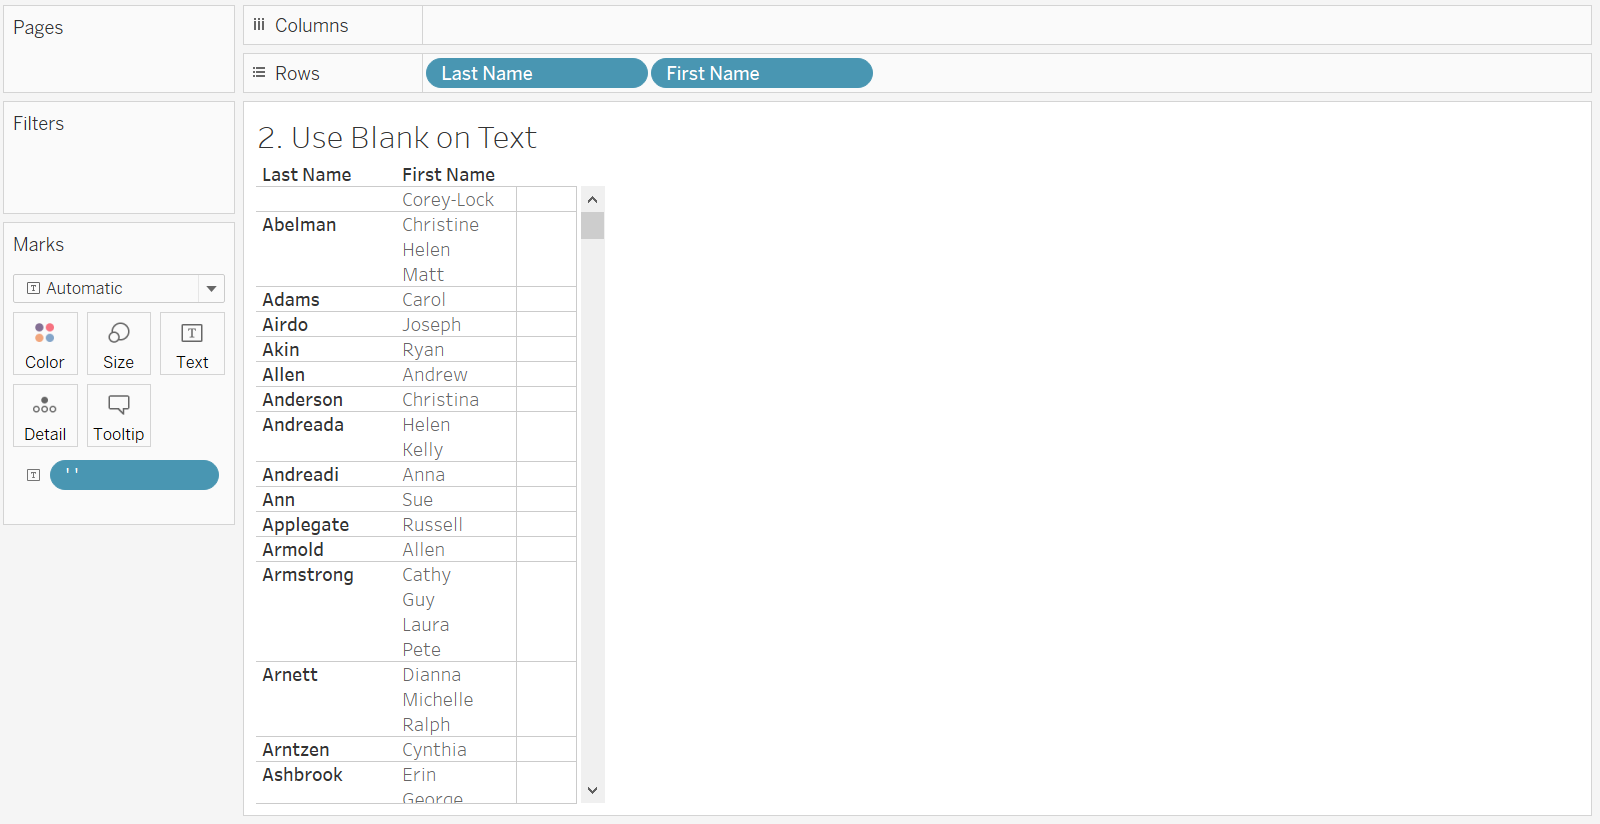
Double-click on the empty area on the Marks Card to type an inline formula. Type two single or double quotes to create an empty text pill. (Ex. ''). Drag this blank pill to Text on the Marks Card. The Abc placeholder is now replaced by the blank text.
CONS - there are several issues with using blank text to remove the Abc placeholder. The mouseover tooltip is still visible(which you can turn off under tooltip), the user can select single marks and multiple marks using the selection tools and there is row highlighting on selection.
Change Color to White
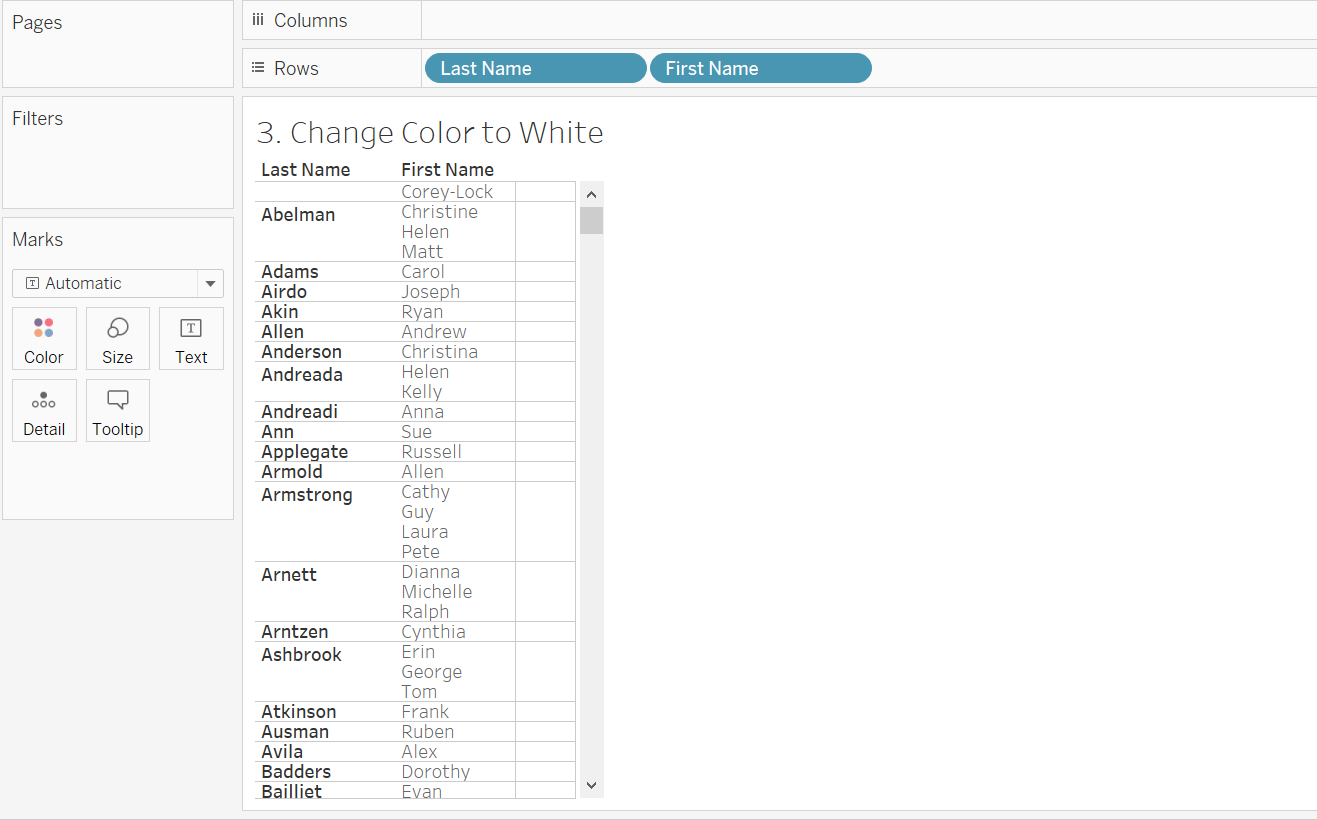
Another option is to change the text color. On Mark card, select Color and change the color to match the background color. In this example, I changed it to white.
CONS - there are several issues with this approach. The mouseover tooltip is still visible (which you can turn off under tooltip), the user can select single marks and multiple marks using the selection tools and there is row highlighting on selection. Also, the Abc placeholder is still visible when the user selects or highlights the cell.
Change the Opacity to 0%
Instead of changing text color, you can also change the opacity to 0%. On the Marks card, select Color and slide the Opacity to 0%. The text will be transparent regardless of background color.
CONS - there are several issues with this approach. The mouseover tooltip is still visible(which you can turn off under tooltip), the user can select single marks and multiple marks using the selection tools and there is row highlighting on selection. Also, the Abc placeholder is still visible when the user selects or highlights the cell.

Resize the Column as Thin as Possible
This is the least fancy one out of seven tricks yet quick and simple. Just click and drag the placeholder column to the left to make it as thin as possible. If the column is narrow enough then the Abcs are no longer visible.
CONS - there are several issues with this approach, but these issues are minimized due to the narrow width of the column. The mouseover tooltip is still visible (which you can turn off under tooltip), the user can select single marks and multiple marks using the selection tools and there is row highlighting on selection.
Note - Solution #3 below does the same things, but in a better way because it removes the column entirely.
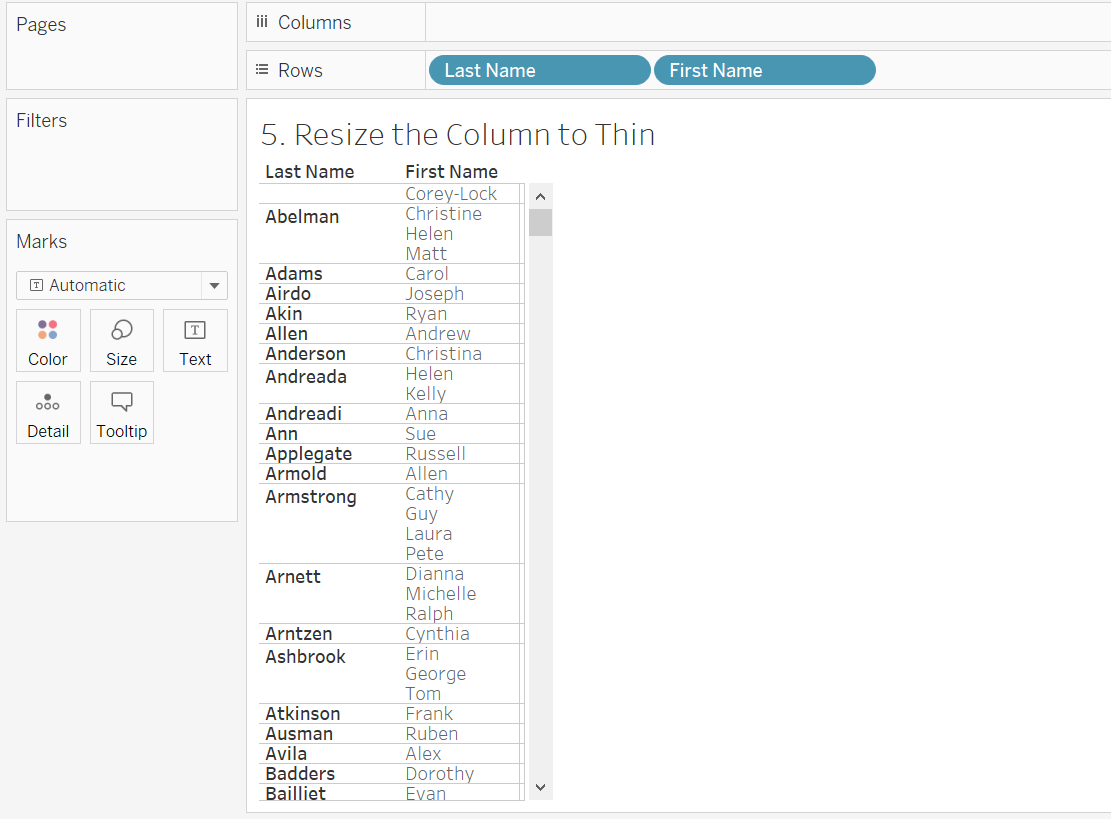
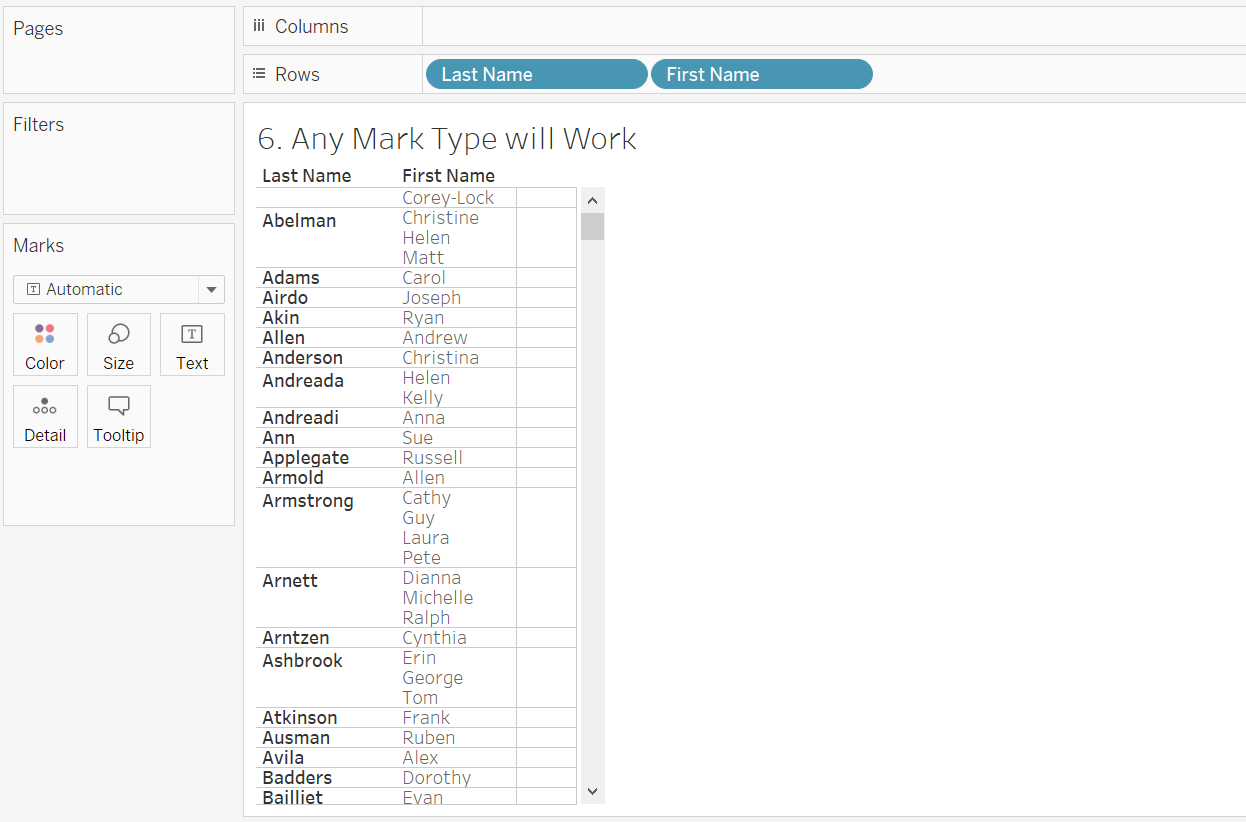
Change the Mark Type, Size and Opacity
Changing the Mark type to anything will really work for this one. Combine with #4 and reduce to Opacity to 100% and select Size on the Marks Card and reduce size to the smallest possible.
CONS - there are several issues with this approach. The mouseover tooltip is still visible (which you can turn off under tooltip), the user can select single marks and multiple marks using the selection tools and there is row highlighting on selection. If the Mark type is Text then the Abc placeholder is still visible when the user selects or highlights the cell. If the Mark type is circle or something else, then the marks are still visible on selection. Often times people will take the Size to as small as possible, but the marks and other issues are still there.
Formatting the Column
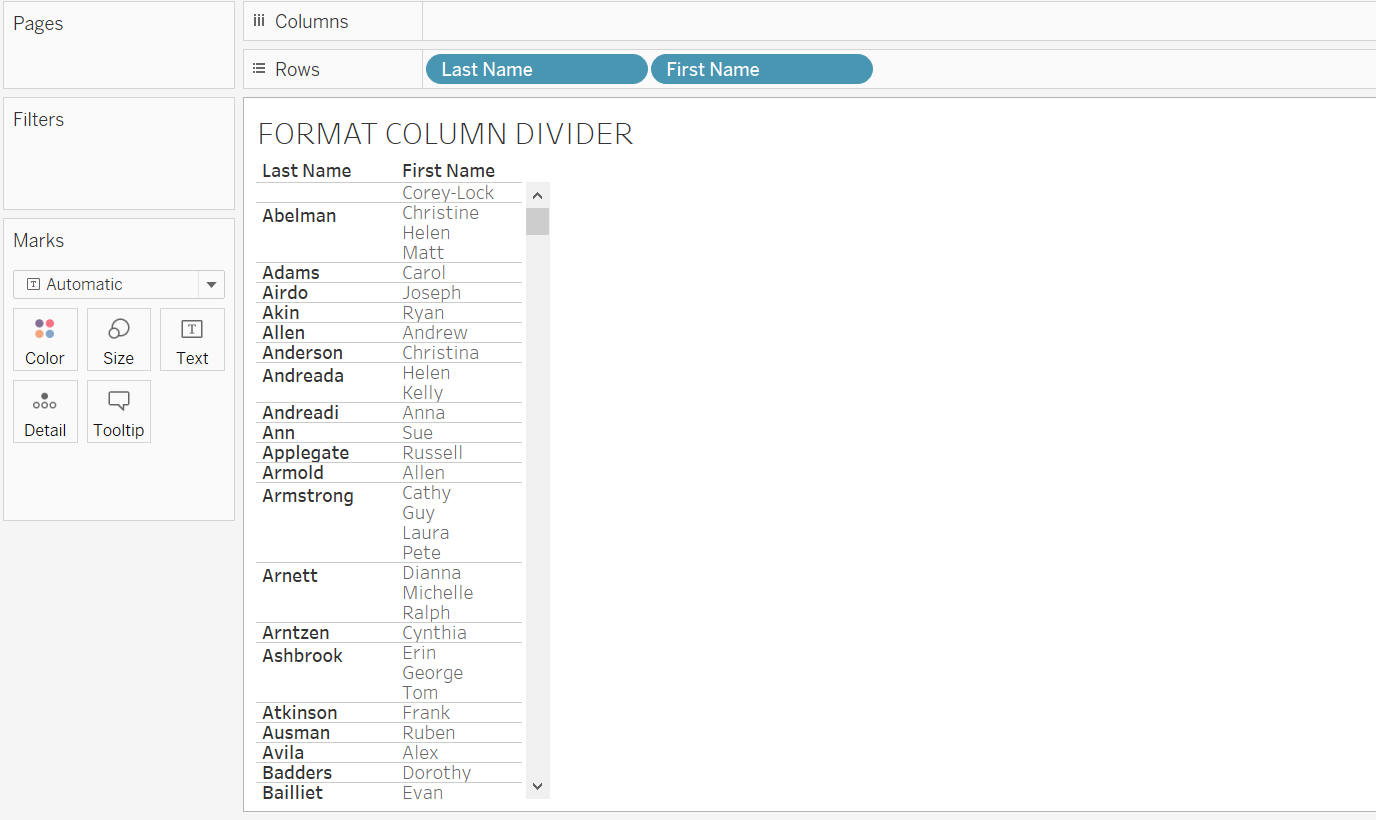
One of the other downsides to all of the solutions above (and #1 below) is that you will likely want to resize the column to the thinnest possible and remove the Column Divider Pane Lines under Border Formatting. Without this additional formatting you will have extra border lines in your table.
Now for the three best methods.
1. Use a Transparent Shape
This solution requires loading a blank transparent shape into the Shapes folder in your Tableau Repository. In general, having this shape handy can be useful for many different things (see note below for more information). Once you've created one, change the dropdown box on the Marks Card to Shape and select the blank shape.
Note - Kevin Flerlage wrote 14 Use Cases for Transparent Shapes and offers this download file of custom transparent shapes. Luke Stanke wrote Six Tips for Transparent Shapes in Tableau.
CONS - this is actually a very good solution. This method does require the steps for creating a blank transparent shape and saving it into your Tableau Repository. It will also require the additional formatting steps discussed above.

2. Use Dimension on Text to make the ABCs Disappear
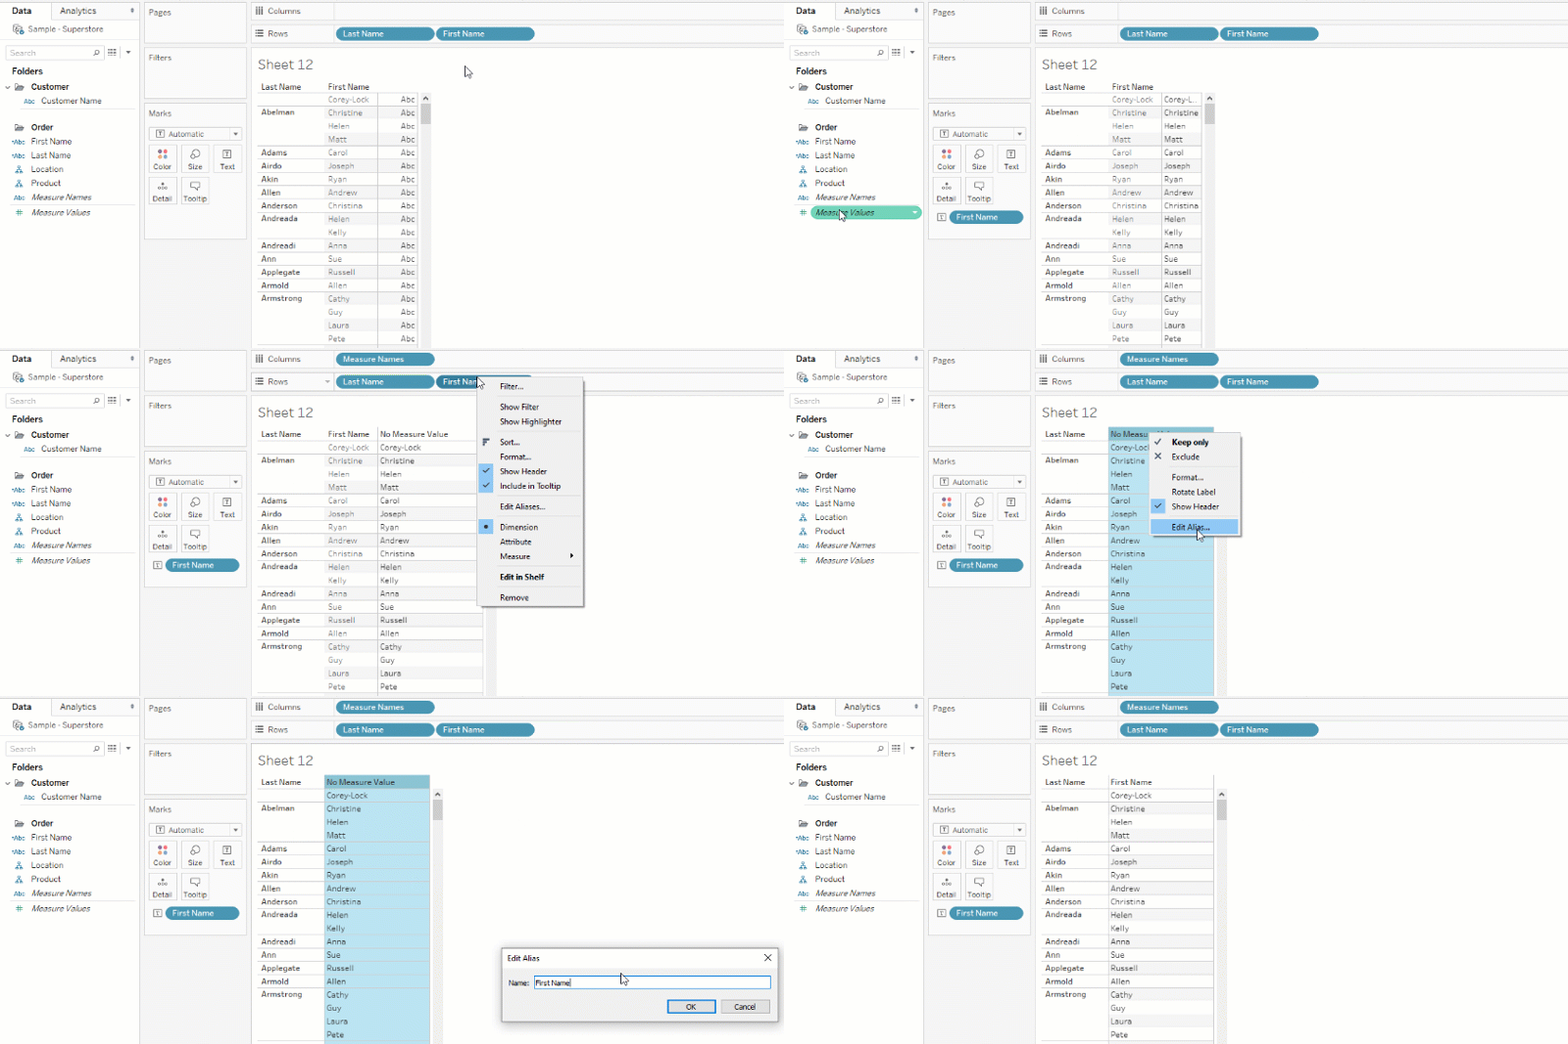
This method replaces the Abc placeholder text with the text of the last dimension.
1.) Duplicate the last dimension on Rows to Text (CTRL-drag from Rows to Text on the Marks Card)
2.) Add Measure Names to Columns
3.) Right-Click on that last dimension on Rows and uncheck Show Header.
4.) Right-Click on Column name "No Measure" and select Edit Alias... to rename the column name.
3. Remove the Entire Column by Resizing (my personal favorite)
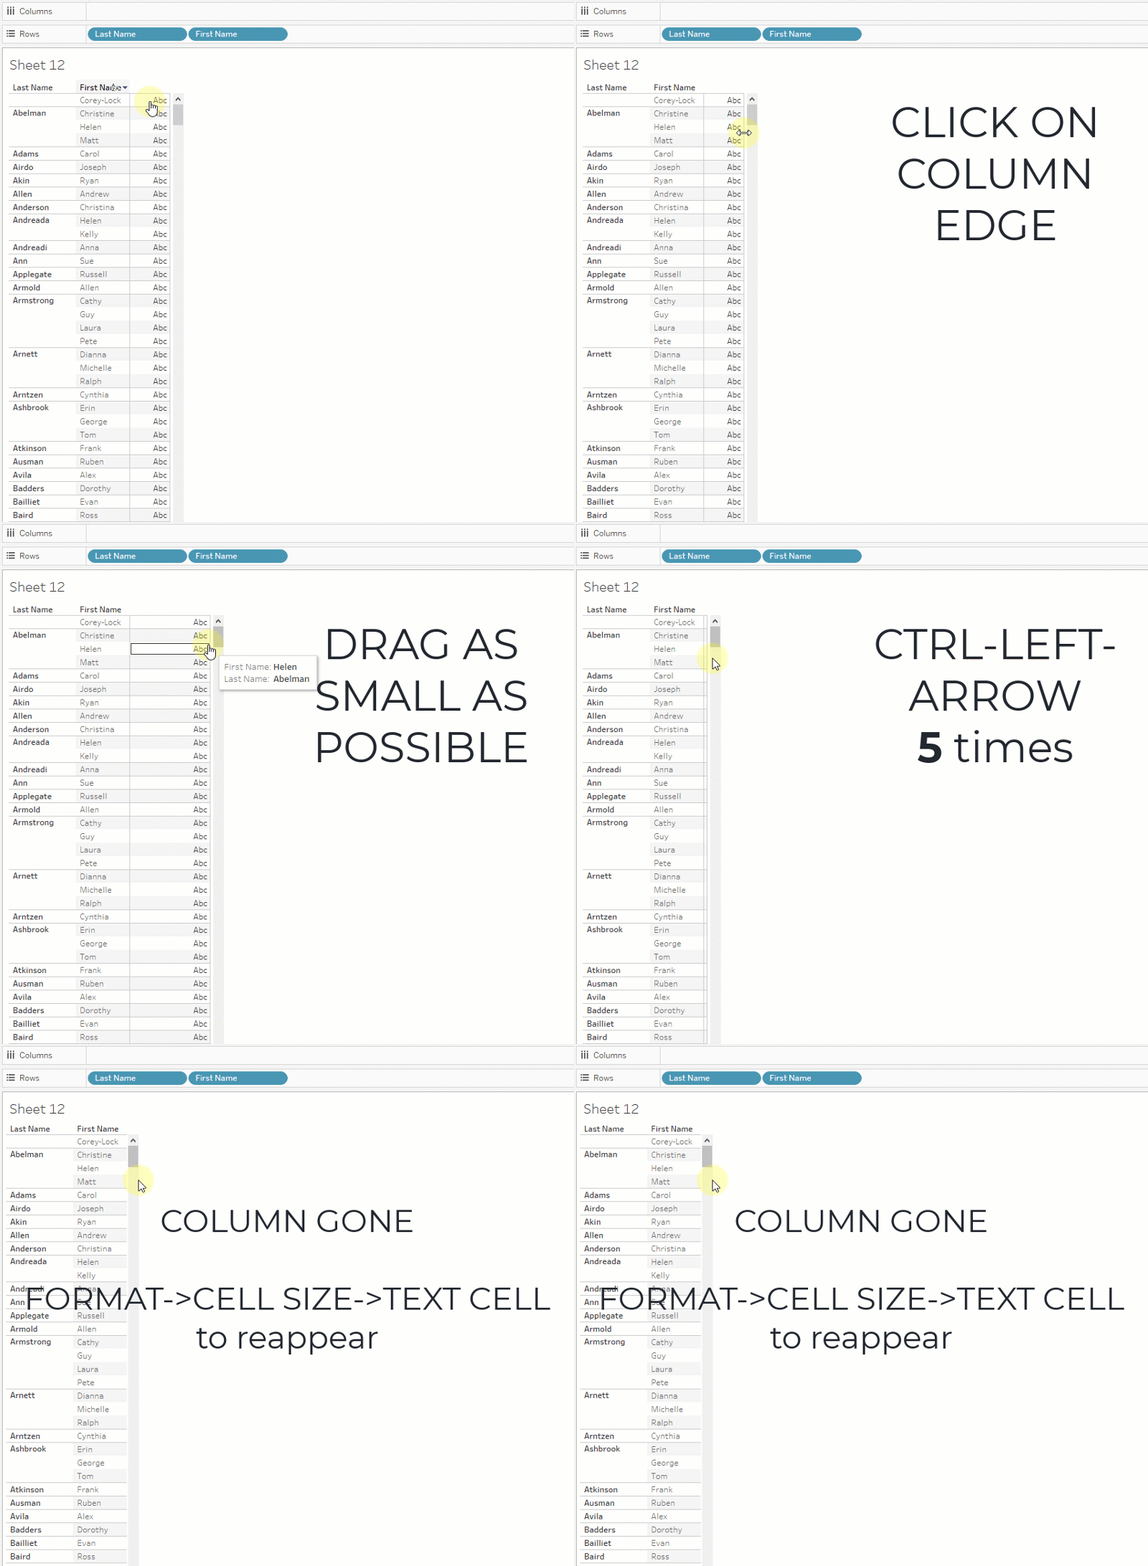
1.) Use CTRL-RIGHT-ARROW three times to make the Abc placeholder column wider.
2.) Manually size the column as small as it will go by dragging the border to the left (making it as thin as possible).
3.) Use CTRL-LEFT ARROW five times and the column will disappear.
NOTE - If you need to make it reappear then use Format -> Cell Size -> Text Cell to reset.
Technical Info on Removing Column by Resizing:
For those of you who like to know what's going on inside Tableau, here are the technical notes. When you manually resize a column, there is a <Style> tag added to the Tableau workbook in the XML. When manually setting the cell width to as small as possible the XML looks like this.
<style-rule element='cell'>
<format attr='width' value='5' />
</style-rule>
Changing the value in the XML from 5 to 0 hides the column completely. Unfortunately, the Tableau Desktop interface doesn't allow you to go down to zero. Therefore, we trick Tableau by using the CTRL-ARROW method of widening and narrowing the columns.
After using the CTRL-RIGHT-ARROW three times the XML changes again, and includes a number of additional values. The important one here is the 'cell-w' value. The default is 60 and each CTRL-RIGHT-ARROW adds 20, taking it from 60 to 120.
<style-rule element='cell'>
<format attr='cell-w' value='120' />
<format attr='cell-h' value='20' />
<format attr='cell' value='20' />
<format attr='cell-q' value='100' />
<format attr='width' value='119' />
</style-rule>
Now when we drag the border to as thin as possible, only the 'width' changes (down to value = 5). The 'cell-w' value stays the same at 120.
<style-rule element='cell'>
<format attr='cell-w' value='120' />
<format attr='cell-h' value='20' />
<format attr='cell' value='20' />
<format attr='cell-q' value='100' />
<format attr='width' value='5' />
</style-rule>
In the final step, we use CTRL-LEFT-ARROW five times. Each one of these decreases the 'cell-w' value by 20 and the 'width' value by 1. Since we have the 'cell-w' value set to 120 we have enough room to decrease it 5 times. This takes the 'cell-w' value down to 20 and the 'width' value to zero, and the column is gone.
<style-rule element='cell'>
<format attr='cell-w' value='20' />
<format attr='cell-h' value='20' />
<format attr='cell' value='20' />
<format attr='cell-q' value='100' />
<format attr='width' value='0' />
</style-rule>
Once the column is gone there is nothing to resize, so you have to reset it from the top menu using Format -> Cell Size -> Text Cell.
Summary of Methods
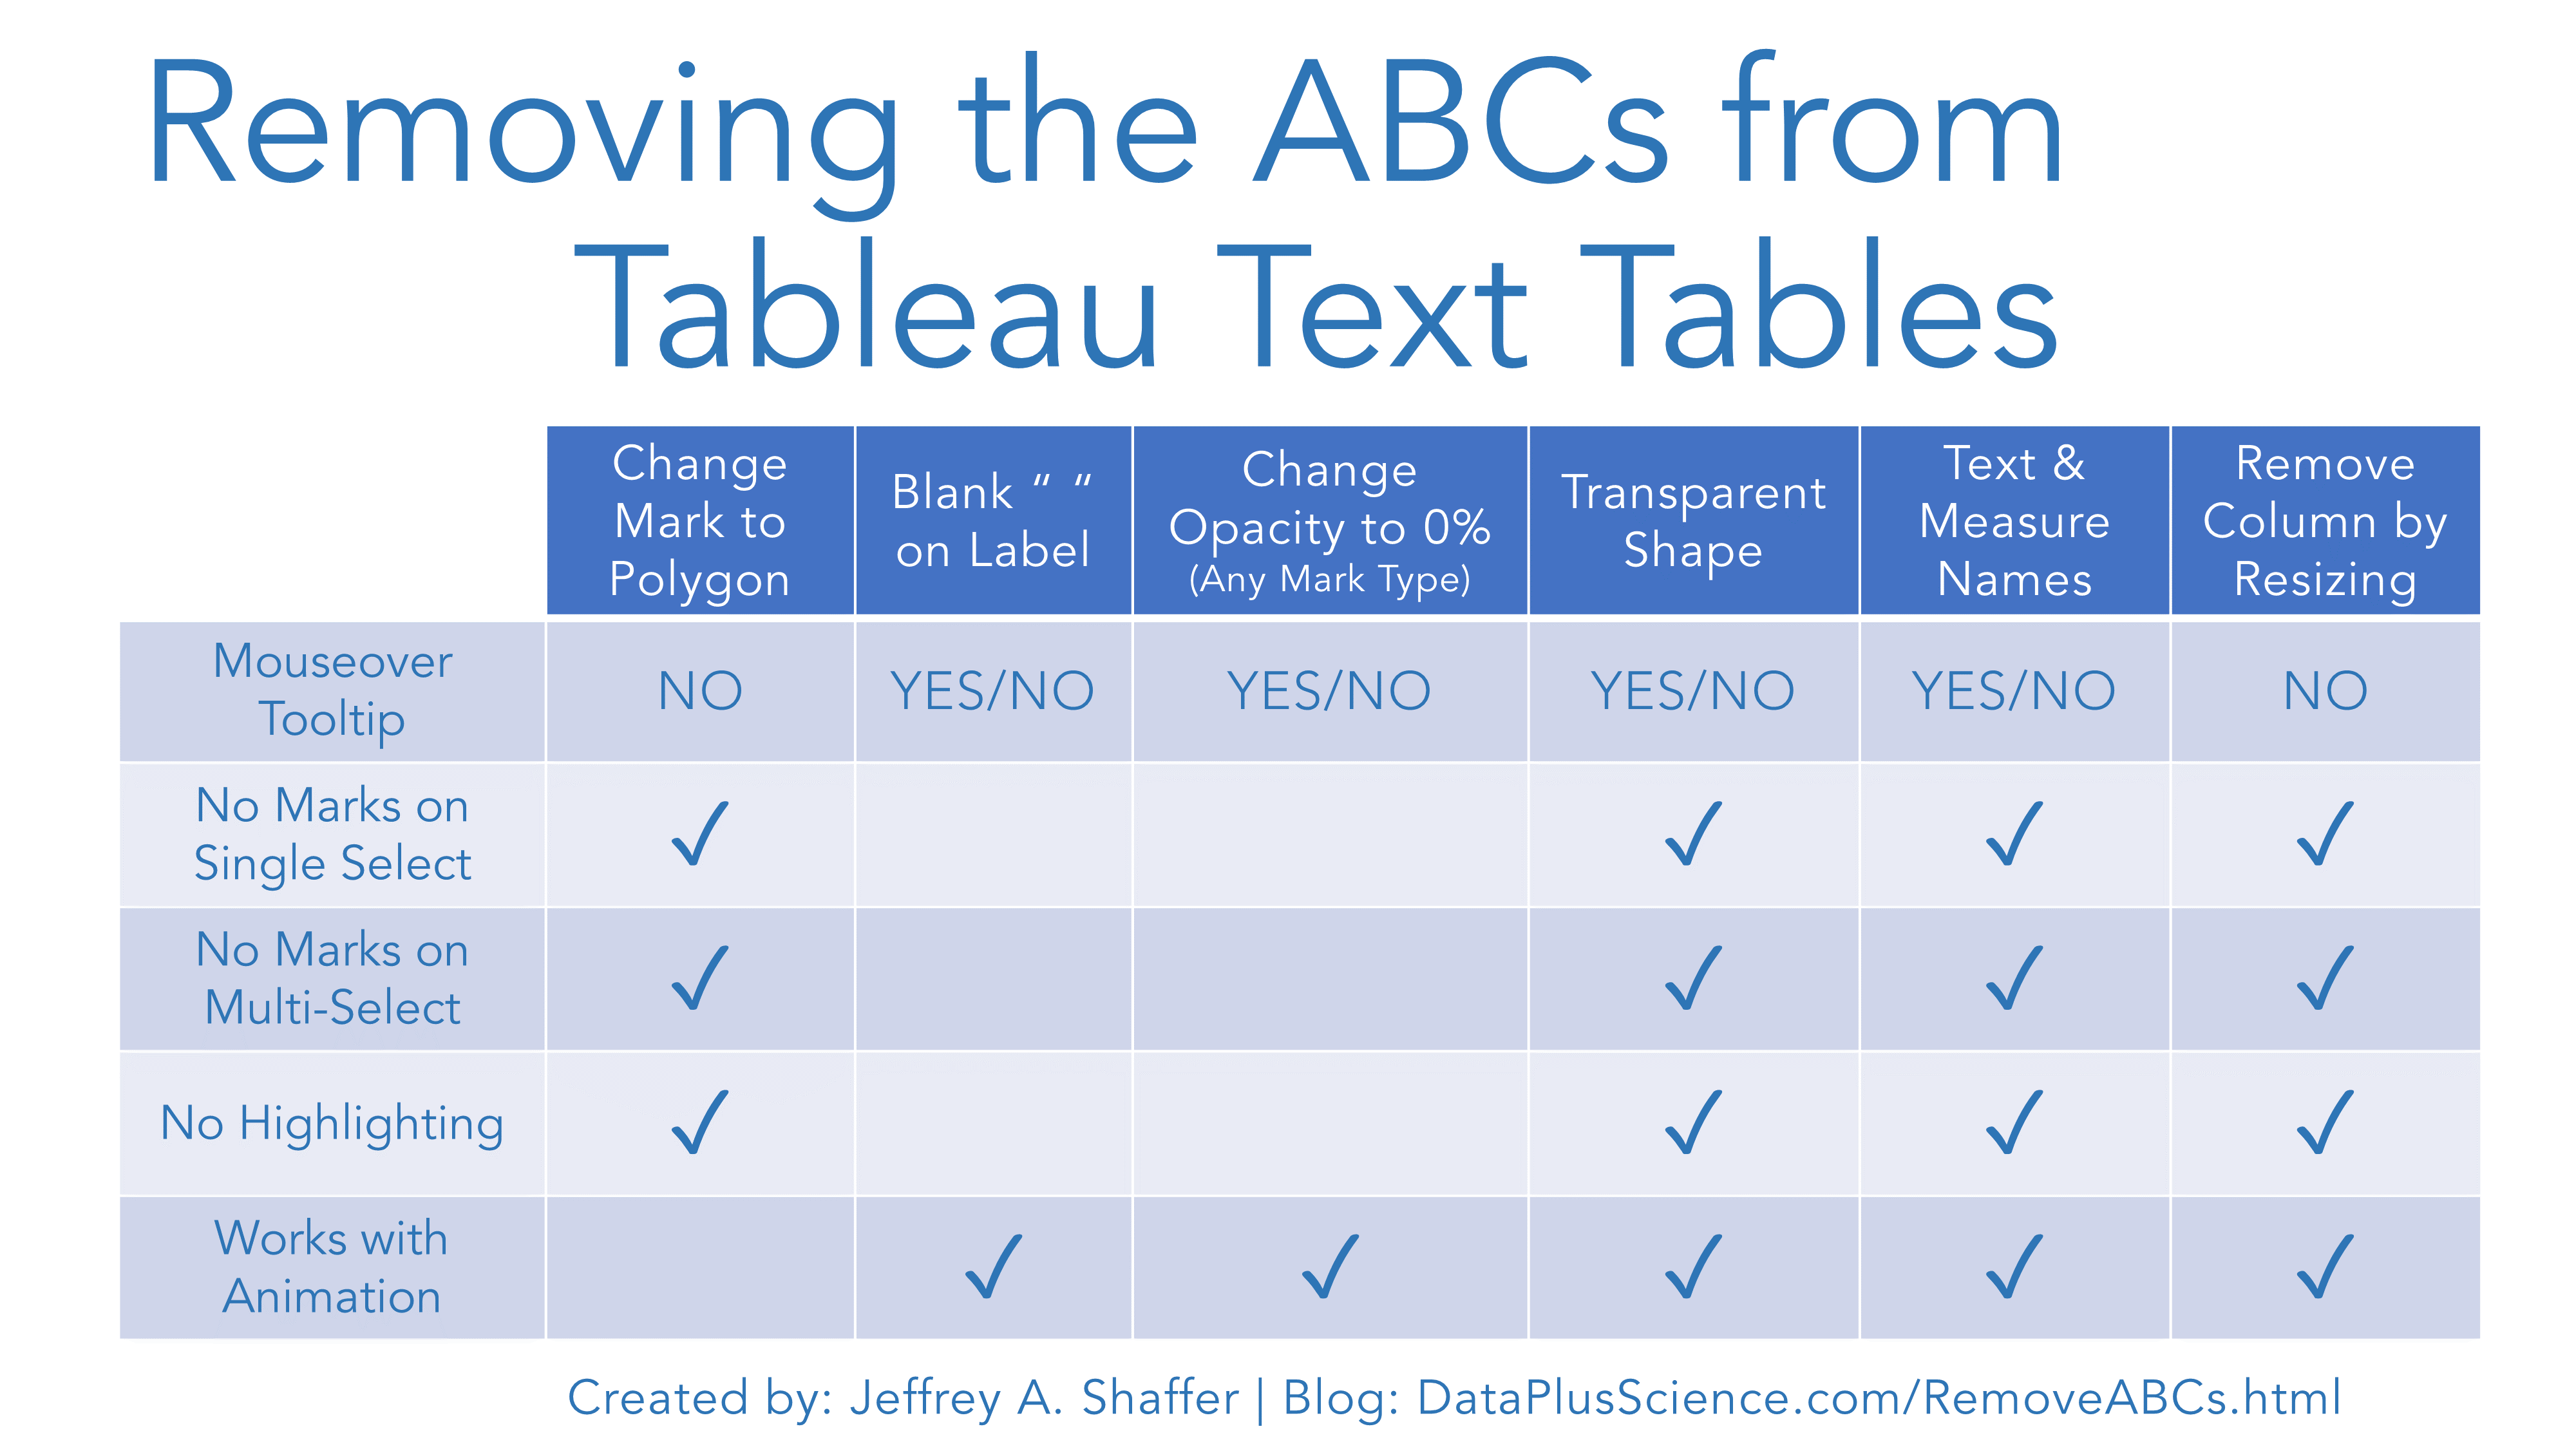
Below is a table outlining the methods mentioned above and some of the issues.
Mouseover Tooltip - the tooltip on mouseover is a default in Tableau, but can be turned off by selecting Tooltip on the Marks card and unchecking Show Tooltips. Polygons will not have this option and if you remove the column (#3 above) then there won't be a column to have the tooltip.
No Marks on Single Select - when you click a mark in Tableau it will select. When you use Blank text or Change the Opacity (and/or size) the mark is still there, so it can be selected.
No Marks on Multi-Select - marks can also be selected in Tableau with a selection tool. Note, the Polygon method will allow a multi-select by default, but this can be solved byadding a Blank Text pill on Path.
No Highlighting - by default, Tableau will highlight a row on select (or multiple rows on mutil-select).
Works with Animation - this is only an issue with the Polygon method. Polygon marks in text tables have been known to cause issue with the Tableau Animated Transitions (aka Animation) when the workbook is published.
Below is a Tableau Public Visualization that you can download to explore these options more.


