5/14/2019
Mapping Paths in Tableau 2019.2
In this blog post, I want to demonstrate one of the amazing new features that is now available in Tableau 2019.2 (currently beta). I am very excited about this because it will make mapping paths so much easier an more efficient, but it will also give us flexibility for some new things. The new functions are MAKELINE() and MAKEPATH().
Up until now, to create a path between two geographic points in Tableau (other than Spatial files), you needed to create two rows of data. One row for the starting point and one row for the ending point. If you have a single starting points, for example the city of Cincinnati, then you would duplicate that row of data over and over again for every destination point in the data. If you have 500 destination points then you would need 1,000 rows of data. We can now do this in Tableau with one row for each point.
Additionally, because the starting or ending point can now be in the same row, we can create a calculated field or a parameter for either point. This makes it super easy to have dynamic starting or ending point. Note, this is possible in the prior versions of Tableau using two rows of data, but required a placeholder row to update dynamically in the data with additional calculations. We can also leverage this to create a two tier path, which I will demonstrate in another post.
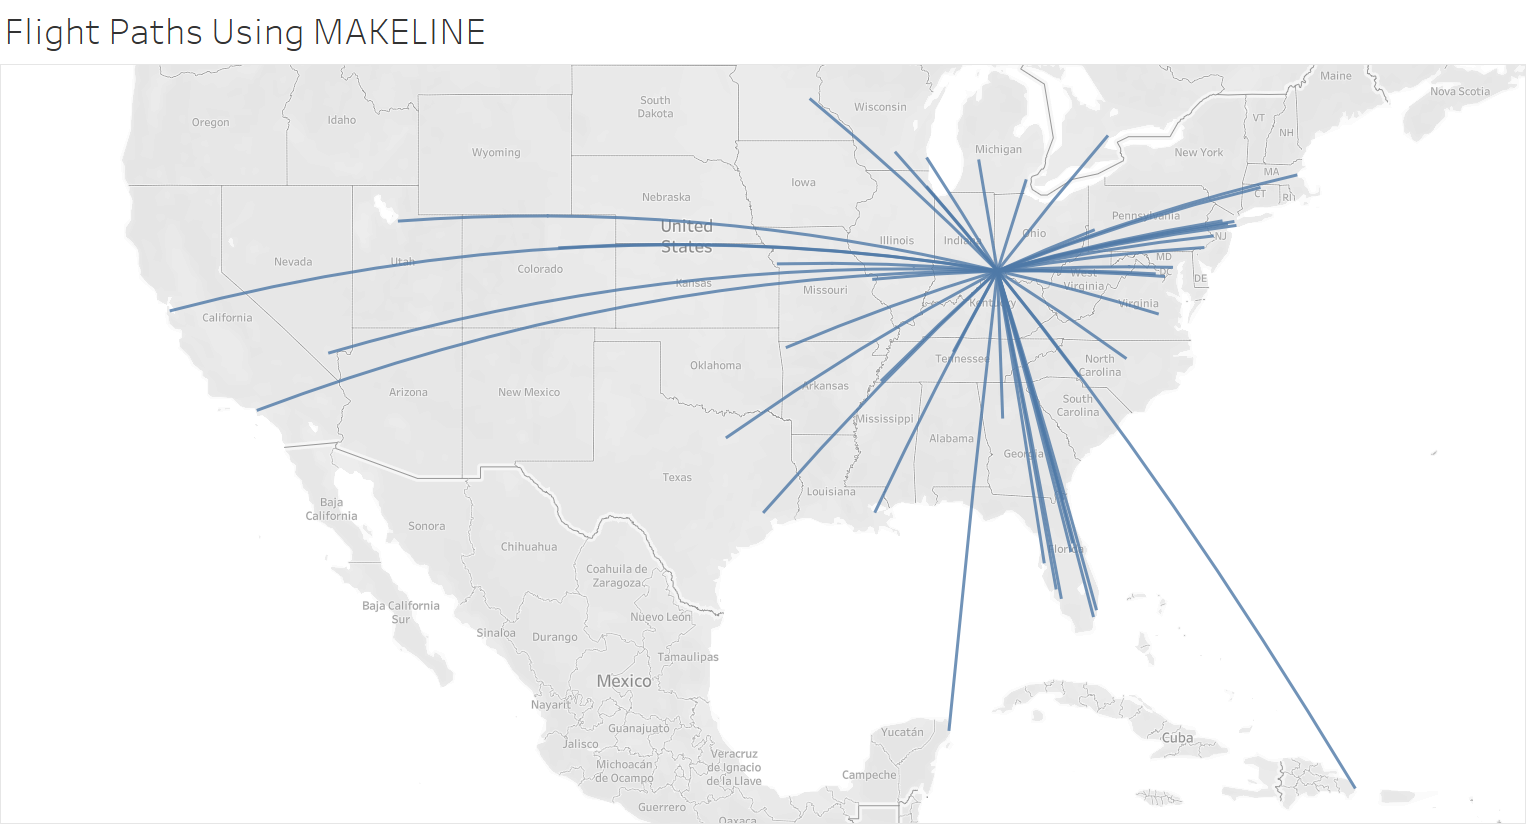
Let's start with a simple example. If you have Tableau 2019.2 beta, then you can download the data here to follow along. This file contains the locations of direct flights from the Cincinnati airport (CVG).
Notice in the data file that there are only 46 rows of data and only one set of coordinates, the Destination Latitude and the Destination Longitude. There is no origin in the data.

Again, in the prior versions of Tableau, we would repeat a single row of data for the Cincinnati airport 46 times to create a two-row pair for each path we wanted to create. In this case it would be a total of 92 rows.
Building Paths Using MAKELINE()
Import the CSV file above into Tableau. Select Data, then New Data Source, then Text File and select the downloaded file. Create a few calculated fields.
Calculated Field: CVG Latitude
Formula: 39.04880142
Calculated Field: CVG Longitude
Formula: -84.6678009
Calculated Field: Flight Path
Formula:
MAKELINE(
MAKEPOINT([CVG Latitude],[CVG Longitude]),
MAKEPOINT([Destination Latitude],[Destination Longitude])
)
That's it! You just created the starting point on the fly with a calculated field, which could also be a parameter, and you created a line between the points using the MAKELINE() and MAKEPOINT() functions.
Note:
MAKEPOINT ([Any Latitude], [Any Longitude]) creates a point on a map using any latitude and longitude.
MAKELINE(Starting MAKEPOINT() , Ending MAKEPOINT() ) creates a line between two points that are made using MAKEPOINT().
Double-click Flight Path to add it to Detail on the Marks Card.
Double-click Destination airport to add it to Detail on the Marks Card.
You should now have a visualization that looks like the image below.

Plotting NYC Citibike on a Single Worksheet
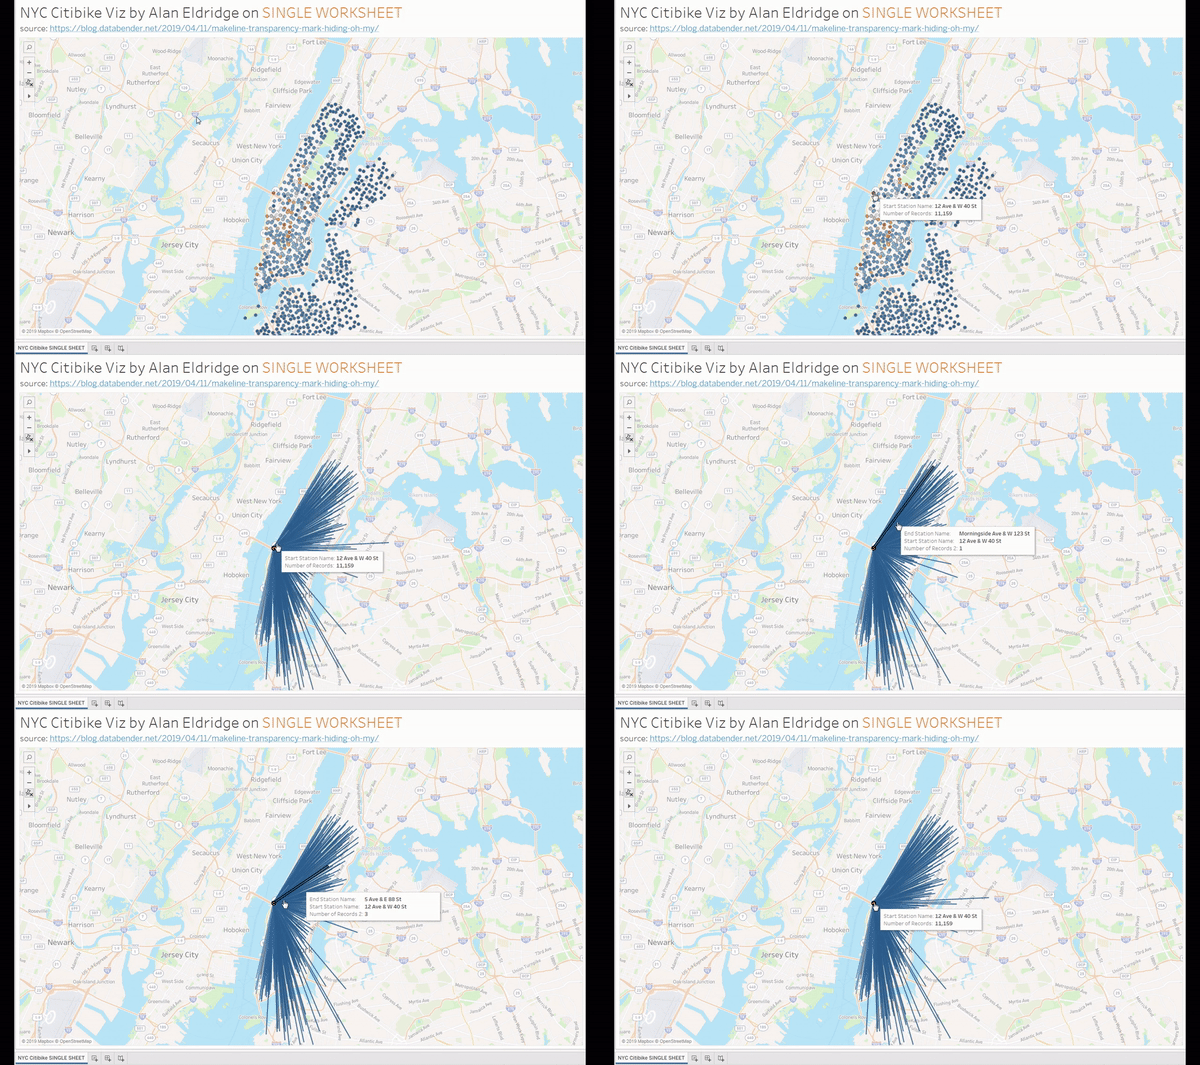
Alan Eldridge posted a great blog post here on how to create a map of NYC Citibike paths using MakeLine() + Transparency + Mark Hiding. This is a great idea, but Alan's technique requires several worksheets layered on top of each other with worksheet transparency and a trick to hide marks. This can actually be done without those techniques simply using the new MAKELINE() and MAKEPOINT() functions along with a set action and filter action.
Download my workbook here to take apart or follow along.
Create a calculated field for Trip Line. We are going to modify Alan's formula using a conditional statement to plot the line if the Keep Set value is True.
Calculated Field: Trip Line
Formula:
if [Keep Set] = TRUE then
MAKELINE
(
MAKEPOINT([Start Station Latitude], [Start Station Longitude]),
MAKEPOINT([End Station Latitude], [End Station Longitude])
)
end
Double-click Start Station Longitude to place on the Columns
Double-click Start Station Latitude to place on the Rows
Duplicate Start Station Longitude on the Columns by holding CTRL and dragging Start Station Longitude next to itself on Columns.
On the second (bottom)Start Station Longitude Marks Card
Change the dropdown menu on the Marks Card to Circle.
Add Start Station Name to the Details
Add Number of Records to Color
Double-click the color legend and change the color to Orange-Blue Diverging and check the box to Reverse the color legend.
s
On the first (top)Start Station Longitude Marks Card
Change the dropdown menu on the Marks Card to Map.
Add Trip Line to the Details
Add Start Station Name to the Details
Add End Station Name to the Details
Right-Click on Number of Records and select Duplicate.
Add Number of Records (copy) to Color.
Double-click the color legend and change the color to Orange-Blue Diverging and check the box to Reverse the color legend.
On the top menu, select Worksheet and Actions (NOTE: This could be done as a Dashboard Action too, adding the worksheet to a Dashboard)
Select Add Action.
Select Change Set Values
Select Keep Set from the Target Set dropdown box.
Set the Clearing Selection to Remove all values from set and click OK.
Select Add Action.
Select Filter.
Set the Clearing Selection to Show all values.
On Target Filters, select Selected Fields and click Add Filter.
In the Field dropdown, select Start Station Name and click OK.
Click OK to close the Filter menu.
Click OK to close the Actions menu.
Clicking on a point on the right-side map should now filter the points and draw lines on the left-side map.
Right-Click on the second Start Station Latitude on Columns and select Dual Axis.
On the top menu, select Map and Map Layers
Set Style to Outdoors in the dropdown box.
Set Washout to 50%
Check the box for Streets, Highways, Routes and Cities in the Map Layer list.

Below is a Tableau Public Visualization putting these pieces together.


